How To - Taking a Booking
-
Begin by selecting the New Booking tab.
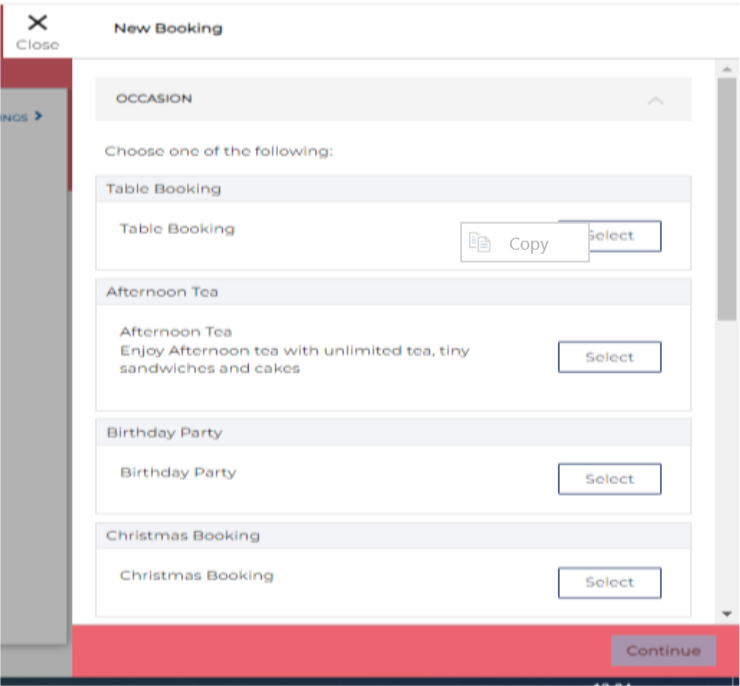
- Select the occasion the guest would like to book for
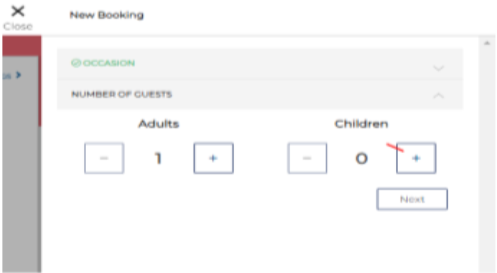
- Select how many covers the table is for by using the plus and minus icons
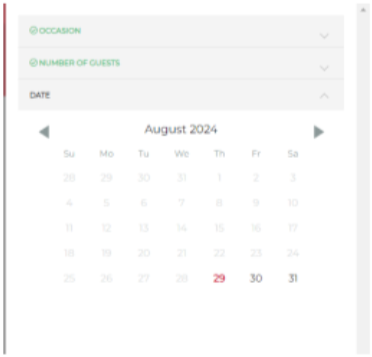
- Select the date using the calendar
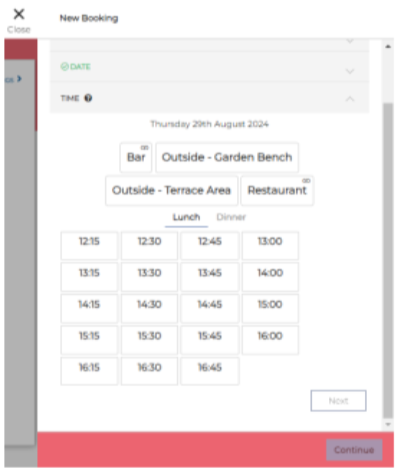
- Select the Area and time.
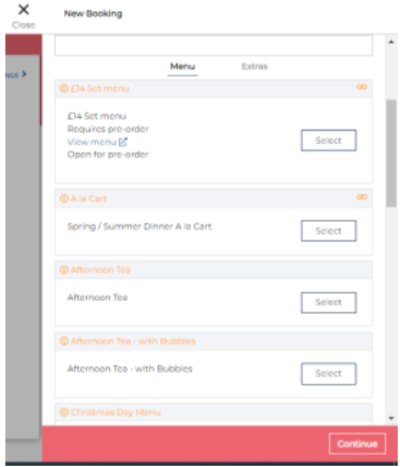
- You are then asked to select a Menu and add any Extras if required.
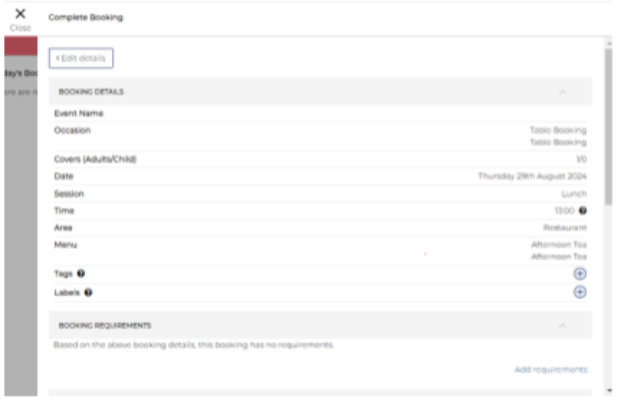
- Once these options have been selected, select Complete.
- To complete the booking, you will have multiple options. These options will depend on booking details such as how many covers are dining, what menu has been selected and if any extras have been added.
- Save as confirmed – A booking that requires no more information and is confirmed.
-
Save as enquiry - A booking that may require more information or requires approval.
-
Save as provisional – A booking that requires a deposit payment or pre-order.
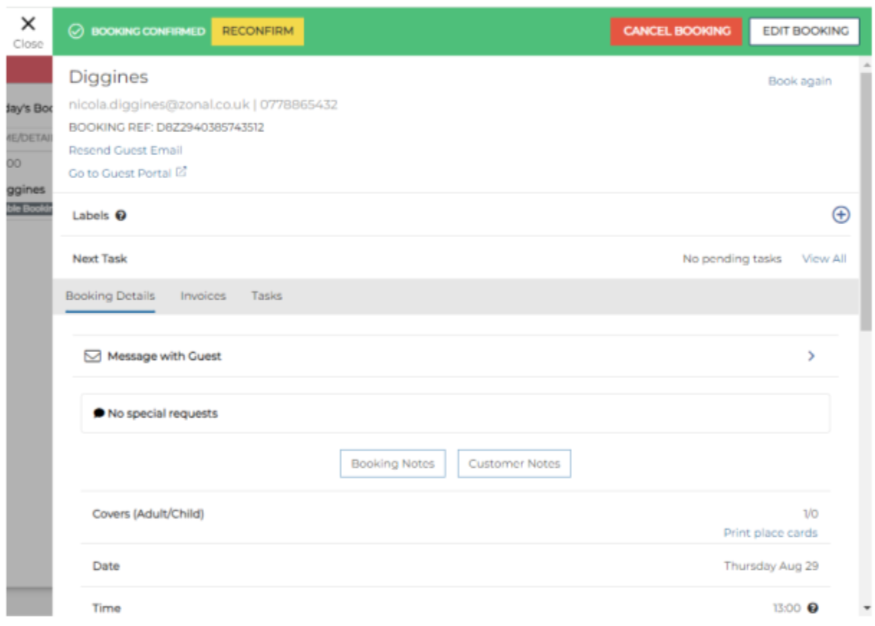
- You can edit a booking by selecting Edit Booking on the booking .
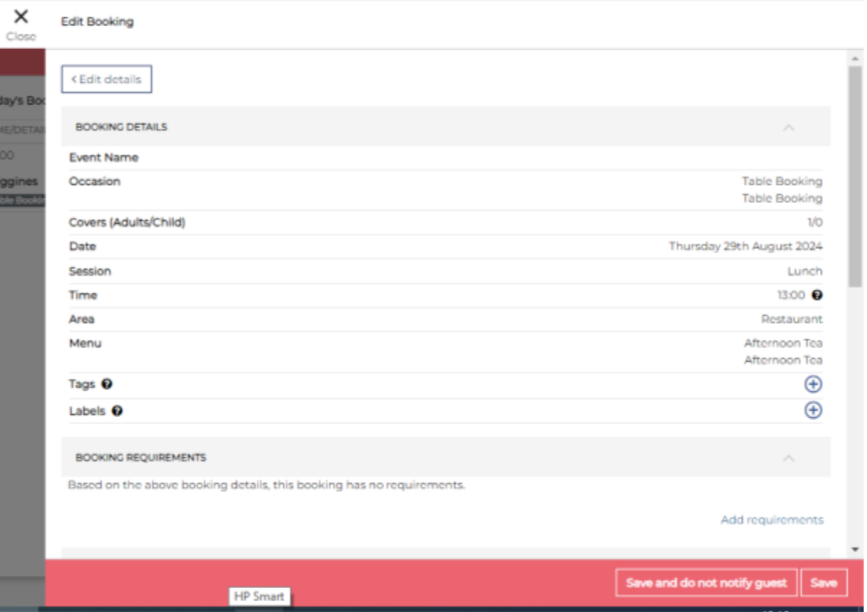
- From this screen you can edit the guest information by scrolling down. If you need to edit any other booking information such as the menu, area or extras, you can select Edit details – once the changes are made, select confirm to bring you back to this screen.
- Select Save
- If you wish to cancel a booking then select the Cancel button.
- If you have predefined messages setup, you can select a reason why. If not, you will need to type your reason.
- Once entered, select Cancel Booking to cancel the booking
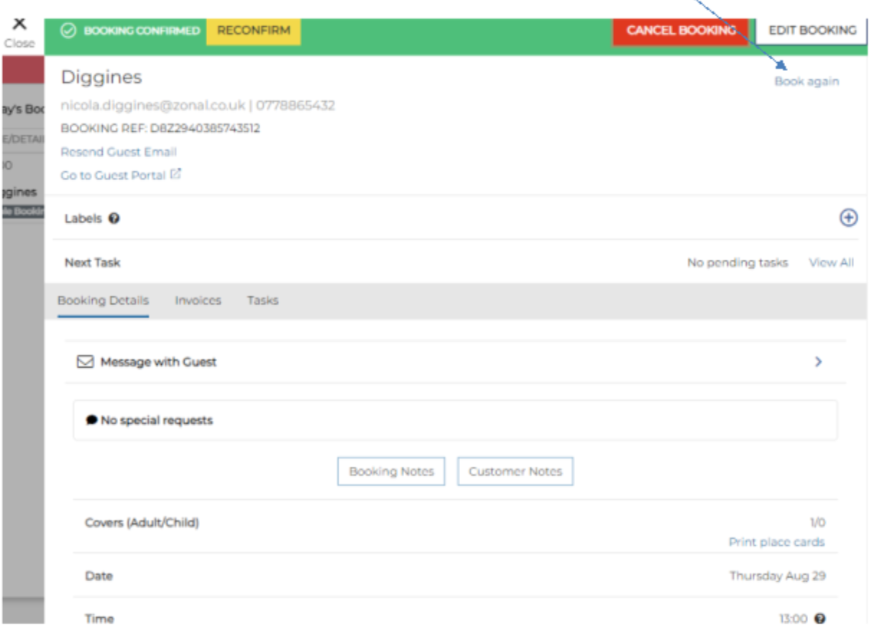
- If a guest would like to book another table, you can select the Book again icon. This will populate the guest details automatically so that you don’t have to input them again.
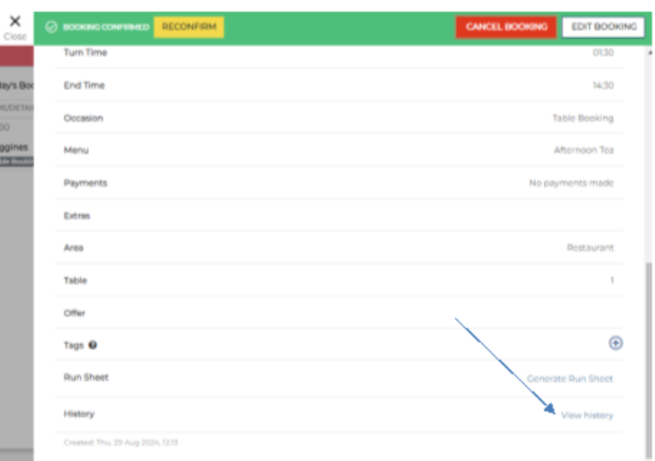
- At the bottom of the booking information panel, there is a History line. If you select the View History link a window with the guest's booking history will appear.

If you don’t have sessions such as ‘Lunch’ or ‘Dinner’ setup, then you will just have a list of times. If the time is amber, then there is no availability.
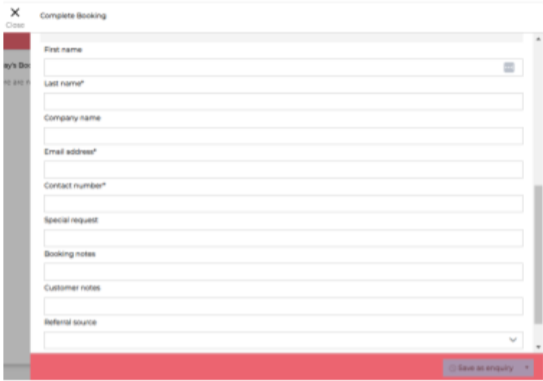
Any fields with an ‘*’ are mandatory and must be completed accurately. ‘Special requests’ and ‘Booking notes’ can be added for that specific booking. ‘Customer notes’ can be added but will follow the guest to future bookings.

Ensure that you don’t enter anything inappropriate as the guest will see this message.

You will need to enter the relevant time, date and booking options again as this may differ